A Complete Guide To Server-Sent Events In JavaScript
Table Of Contents
When it comes to developing an application that enables real-time operations, the first thing that comes to mind is WebSockets, which is fine, but there are other options that need to be considered.
One of them is Server-Sent Events, which enable a unidirectional communication flow between server and client.
Server-Sent Events
Server-Sent Events is a server push technology that allows a client to receive automatic updates from the server via an HTTP connection.
They are very easy to implement, but there are some important things you should know before choosing them for your application:
- The technology is based on the plain HTTP
- Allows only unidirectional data flow (as already mentioned)
- It is limited to pure text data, no binaries allowed
The API
The Server-Sent Event API is contained in the EventSource interface.
Open a connection (same domain)
To open the connection to a server, create a new EventSource object with the URL of the script that generates the events:
const eventSource = new EventSource("/api/events");Open a connection (other domain)
If the URL passed to the EventSource is on the other domain, a second parameter can be specified and a withCredentials property can be set to true, which means that the Cookie will be sent together:
const eventSource = new EventSource("http://localhost:8000/api/events", { withCredentials: true });Listen for messages
Once the connection is instantiated, we need to listen to the events coming from the server:
eventSource.addEventListener("message", (event) => {
  // "event.data" is a string
  const data = JSON.parse(event.data);

  // Prints whatever was sent by the server
  console.log(data);
});
Important note: As the server only sends text data, we have to stringify it on the server-side and parse it on the client.
Listen for errors
If an error occurs (network timeout or something), an error event is generated and we can listen for it:
eventSource.addEventListener("error", (error) => {
  // Prints the information about an error
  console.log(error);
});
Listen for an open connection
When the connection is opened, an open event is generated and we can listen for it as well:
eventSource.addEventListener("open", (event) => {
  // Prints the information about an event
  console.log(event);
});
Check the state of the connection
The state of the connection is stored in the readyState property of the EventSource:
- 0 - EventSource.CONNECTING
- 1 - EventSource.OPEN
- 2 - EventSource.CLOSED
const connectionState = eventSource.readyState;Close the connection
When the connection between the server and the client interrupts, it is automatically restarted.
However, it can be terminated with the close method:
eventSource.close();Server-Side Implementation
To establish a connection with the client, we have to send 200 status code together with the Content-Type: text/event-stream and Connection: keep-alive headers.
Let's take a look at the complete example with Node.js and explain each line of code in the comment above:
const express = require("express");
const bodyParser = require("body-parser");
const cors = require("cors");

const app = express();

const PORT = 3000;

// Store all connected clients
let clients = [];

const addSubscriber = (req, res) => {
  // Set necessary headers to establish a stream of events
  const headers = {
    "Content-Type": "text/event-stream",
    Connection: "keep-alive",
  };
  res.writeHead(200, headers);

  // Add a new client that just connected
  // Store the id and the whole response object
  const id = Date.now();
  const client = {
    id,
    res,
  };
  clients.push(client);

  console.log(`Client connected: ${id}`);

  // When the connection is closed, remove the client from the subscribers
  req.on("close", () => {
    console.log(`Client disconnected: ${id}`);
    clients = clients.filter((client) => client.id !== id);
  });
};

const notifySubscribers = (message) => {
  // Send a message to each subscriber
  clients.forEach((client) =>
    client.res.write(`data: ${JSON.stringify(message)}\n\n`)
  );
};

// Add a new message and send it to all subscribed clients
const addMessage = (req, res) => {
  const message = req.body;

  // Return the message as a response for the "/message" call
  res.json(message);

  return notifySubscribers(message);
};

// Get a number of the clients subscribed
const getSubscribers = (_req, res) => {
  return res.json(clients.length);
};

app.use(cors());
app.use(bodyParser.json());
app.use(bodyParser.urlencoded({ extended: false }));

// Define endpoints
app.get("/subscribe", addSubscriber);
app.post("/message", addMessage);
app.get("/status", getSubscribers);

// Start the app
app.listen(PORT, () => {
  console.log(`App listening on port ${PORT}`);
});
The main purpose of this code is to track all connected clients and inform them about the data sent to the /message endpoint.
Important note: \n does a line break. \n\n means the end of the message, do not forget to add that.
Client-Side Implementation
On the client-side, we create a simple React component using the EventSource API to connect to the event stream and display the real-time data:
const App = () => {
  const [data, setData] = useState([]);

  useEffect(() => {
    // Subscribe to the event stream
    const eventSource = new EventSource("http://localhost:3000/subscribe");
    eventSource.addEventListener("message", handleReceiveMessage);
    return () => {
      // Remove event listener and close the connection on unmount
      eventSource.removeEventListener("message", handleReceiveMessage);
      eventSource.close();
    };
  }, []);

  // Get the message and store it in the state
  const handleReceiveMessage = (event: any) => {
    const eventData = JSON.parse(event.data);
    setData((data) => data.concat(eventData));
  };

  // Send 5 random chars to the server
  const handleSendMessage = () => {
    axios.post("http://localhost:3000/message", {
      message: generateRandomChars(5),
    });
  };

  return (
    <div style={{ padding: "0 20px" }}>
      <div>
        <h4>Click to send a message</h4>
        <button onClick={handleSendMessage}>Send</button>
      </div>
      <div>
        <h4>Message List</h4>
        <p>Number of messages: {data.length}</p>
        {data.map((item, index) => (
          <div key={index}>{item.message}</div>
        ))}
      </div>
    </div>
  );
};
Putting It All Together
To see our example in action, start the client (your start script may look different):
yarn start
And the server:
node server.js
You should see the app running:

And the server:

Notice the log Client connected: 1607163222261 which means that the connection has been established and we can use the channel to send events.
Click on the Send button on the UI (which POSTs 5 random characters to the /message endpoint) and notice how they appear in the list:

Custom Event Types
The default event type used by Server-Sent Events is a message.
A custom event can be sent by specifying the event at the start:
client.res.write(`event: join\ndata: ${JSON.stringify(message)}\n\n`);And then the client can listen for this event:
eventSource.addEventListener("join", handleReceiveMessage);Auto Reconnect
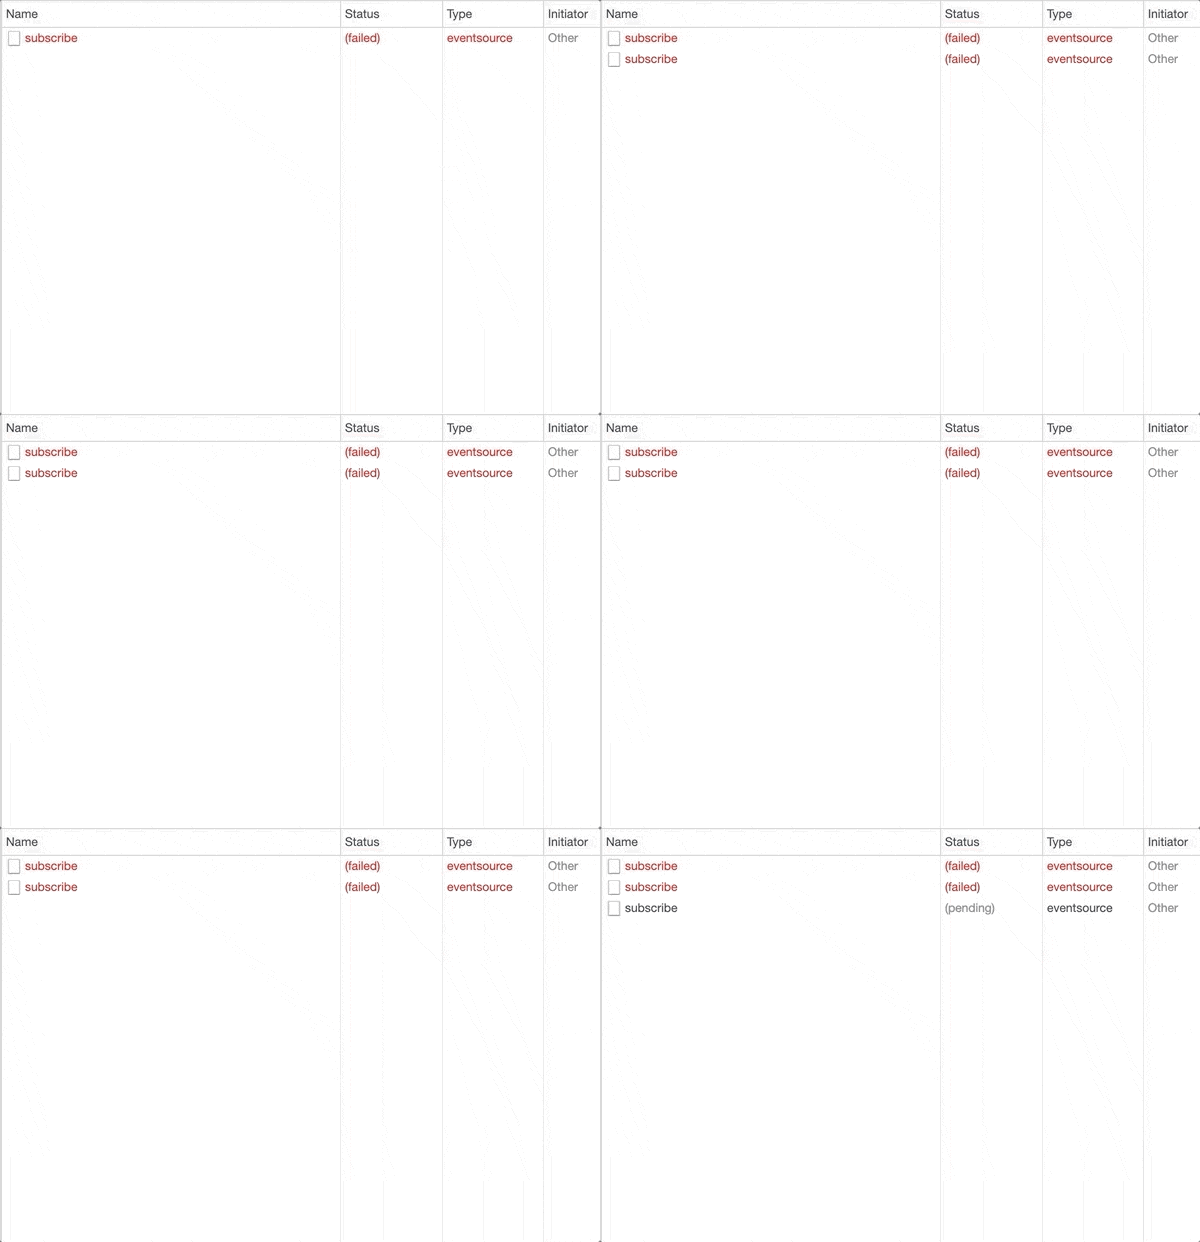
If the server crashes or the connection is lost, the EventSource tries to reconnect, we do not need to worry about it.
There is usually a delay of a few seconds between reconnections:

The server can specify a recommended delay by specifying the retry at the beginning of an event:
// Retry each 5 seconds
client.res.write(`retry:5000\ndata: ${JSON.stringify(message)}\n\n`);
If the browser knows that there is no Internet connection at the moment, it will try again to reconnect once the Internet connection is established.
Last-Event-Id Header
It is essential that the connection is resumed at the same point where it was interrupted so that no messages are lost.
This can be achieved with the Last-Event-Id header, which is automatically added when a certain condition is met.
Each message from the server should contain a unique id field:
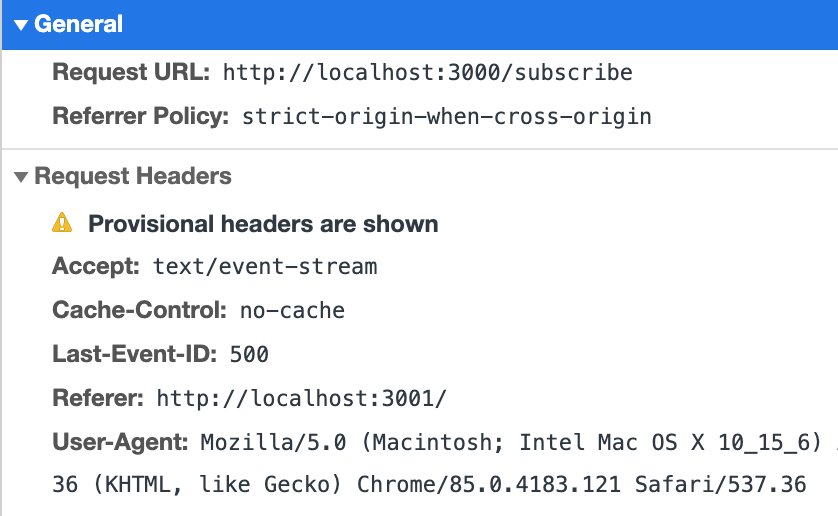
client.res.write(`data: ${JSON.stringify(message)}\nid:500\n\n`);When the browser receives a message with a set id, it sets the eventSource.lastEventId property to its value and sends this value in the Last-Event-Id header when reconnected:

Important note: the id should be appended by the server after the data to ensure that the eventSource.lastEventId is updated after the message is received.
Browser Support
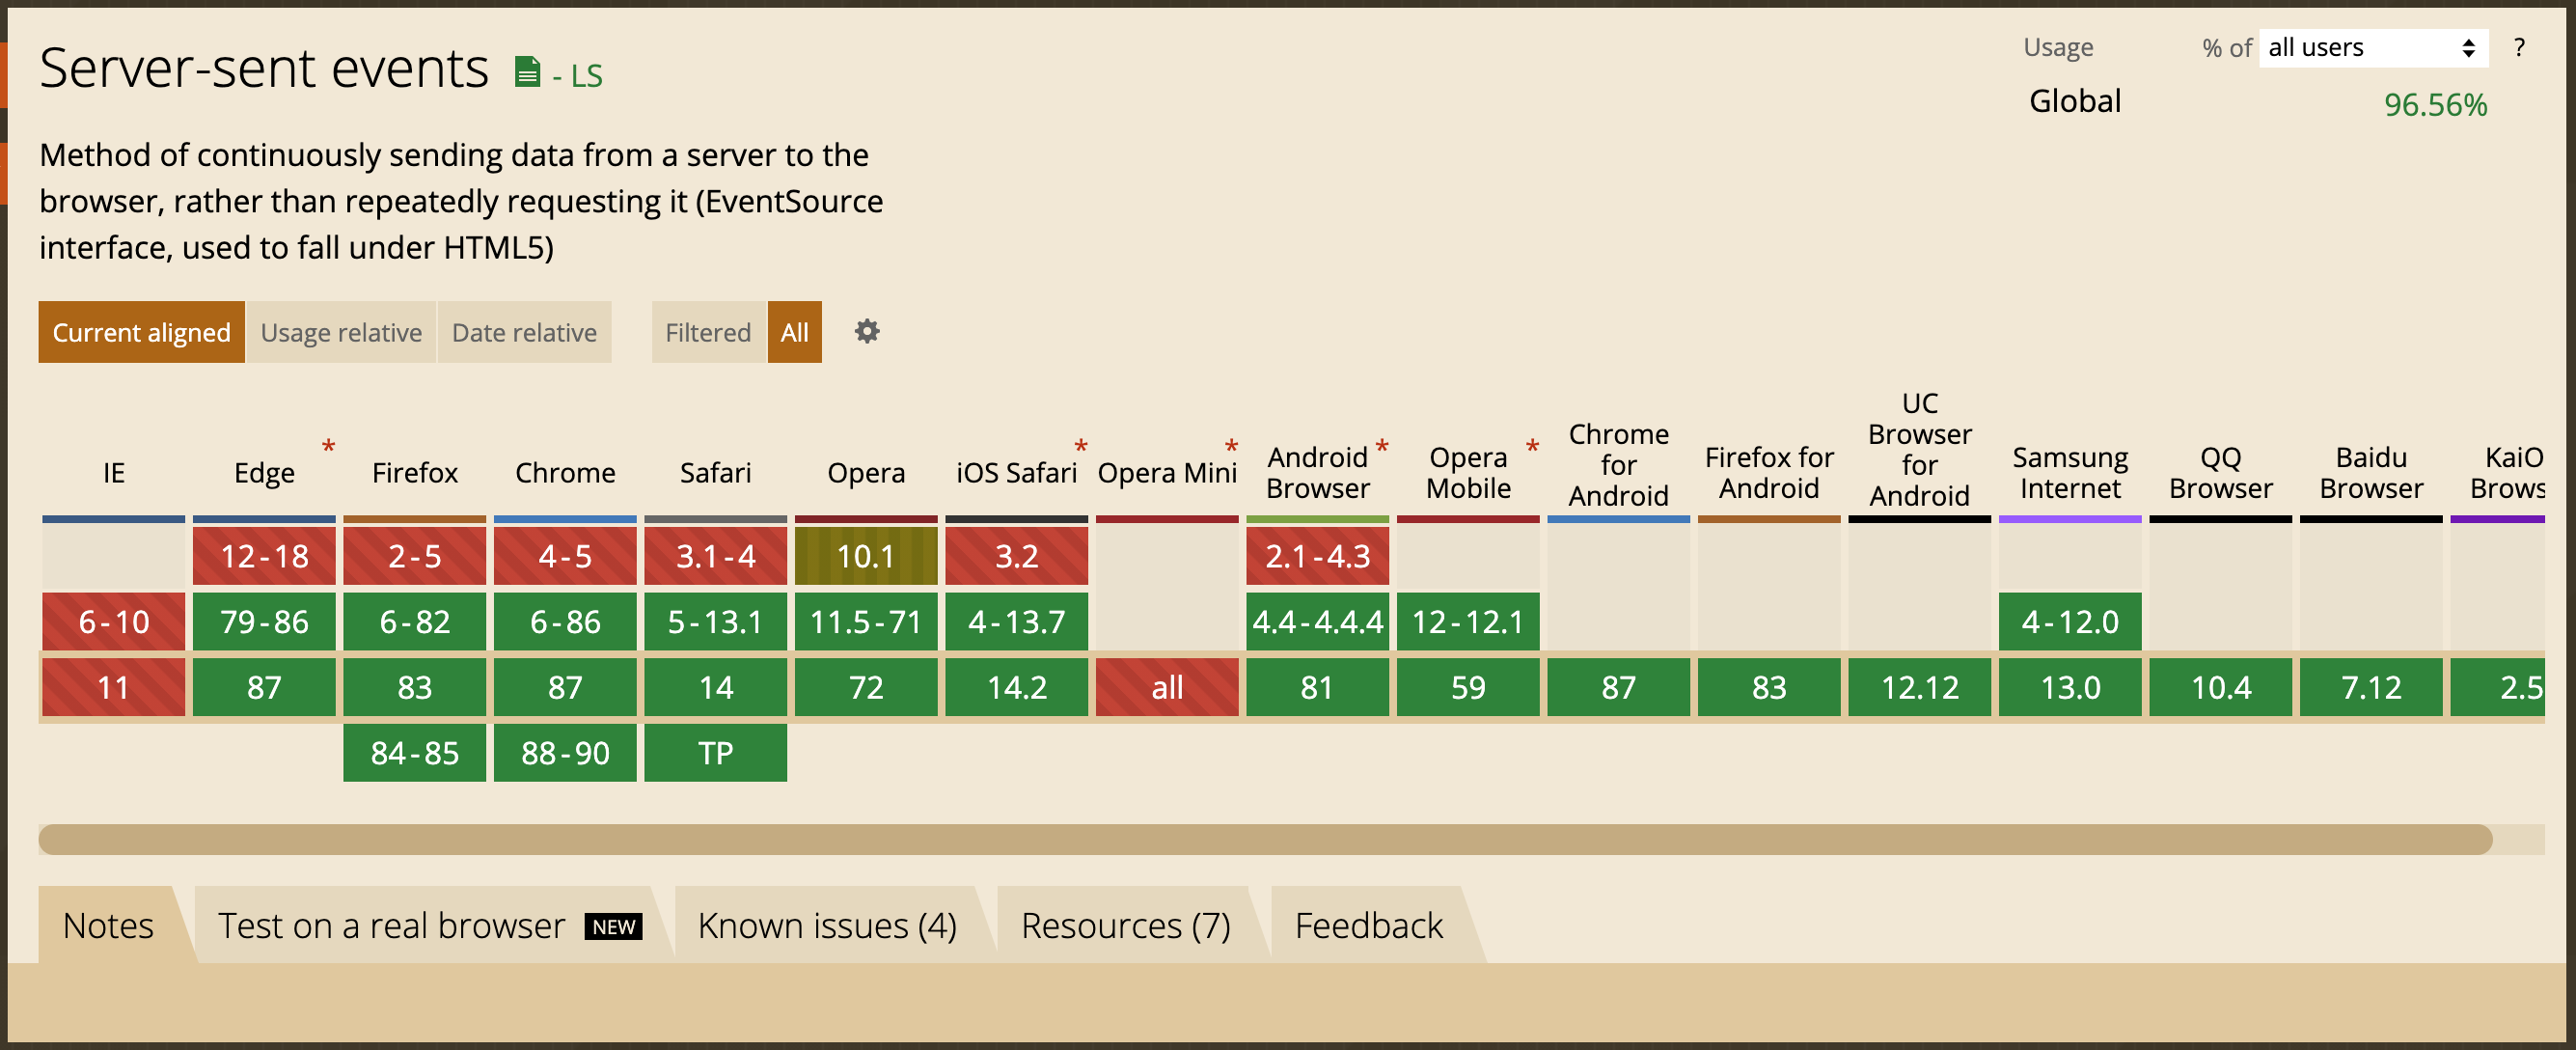
According to caniuse, Server-Sent Events are available for more than 96% of the users as of 06.12.2020:

The following code can be used to check if the browser supports the feature:
if ("EventSource" in window) {
  // Implement it
}
Sever-Sent Events vs. WebSockets
The WebSocket protocol enables the exchange of events between the server and the client. The data can be sent in both directions.
What are the main differences between the two technologies?
- Server-Sent Events are based on HTTP, WebSockets on the WebSocket protocol
- Server-Sent Events do not allow bidirectional data flow, WebSockets do
- Server-Sent Events do not allow sending binary data, WebSockets do
- Server-Sent Events provide an automatic reconnection if the connection is lost, WebSockets do not (you have to implement it manually)
- Server-Sent Events have a limited maximum number of open connections (6), which can be painful if you need to open more tabs, WebSockets have no limitations
When you see all these disadvantages of using Server-Sent Events, are they really a competitor to WebSockets?
They are much easier and faster to implement. So if you need a quick way to set up the real-time unidirectional communication between server and client and are aware of all the potential risks, this is the best way to go.
However, be aware that there is a high probability that the solution will eventually be refactored to the WebSockets.
Summary
Server-Sent Events offer a simple way to establish a unidirectional data flow between the server and the client via HTTP connection.
Like any other feature, they have their own advantages and disadvantages, so the choice of this technology takes some time to verify that one of its limitations does not conflict with the project requirements.